

You’ve attached the box blade and adjusted the top link, but your first pass chews ruts instead of leveling soil. The scarifiers are digging too deep, the gauge wheels aren’t contacting the ground, and you’re leaving ridges high enough to trip over. Proper technique isn’t intuitive—it’s a sequence of adjustments most operators skip. The result? You’ll fight your own equipment until you understand exactly how the blade, scarifiers, and hitch geometry work together. There’s a method to this.
What Is a Box Blade and When Do You Need One?
Why struggle with uneven ground when a box blade can transform your tractor into a precision grading tool? A box blade is a three-sided metal scraper you attach via your tractor’s three-point hitch. It carries front and rear scraping blades plus adjustable scarifiers mounted on a central crossbeam.
You’ll use this tool for leveling, smoothing, spreading materials, and breaking compacted soil. Lower the scarifiers to rip hard ground; retract them for finish passes. Adjust your top-link length and float position to control cutting depth versus floating action.
You need a box blade when you’re filling low spots, knocking down ridges, or contouring surfaces for drivable, even finishes. It fits Kubota and comparable tractors through universal quick-attach systems—install per your manual’s specifications.
Recommended Products

55" Working Width:55" Tow Behind Box Scraper will help you grow the beautiful lawn that you've always wanted.

Comprehensive Pack for Daily Use: equip yourself with 6 replacement box blade shank points, perfectly measured at about 5.2 x 1.3 inches, 2 inches in height each; Replace worn-out blades conveniently or share with friends and family to ensure you have enough supply for your daily requirements

Sale of Individual Quantities of H&L K-1306 Spring Clips
How to Attach and Set Up Your Box Blade
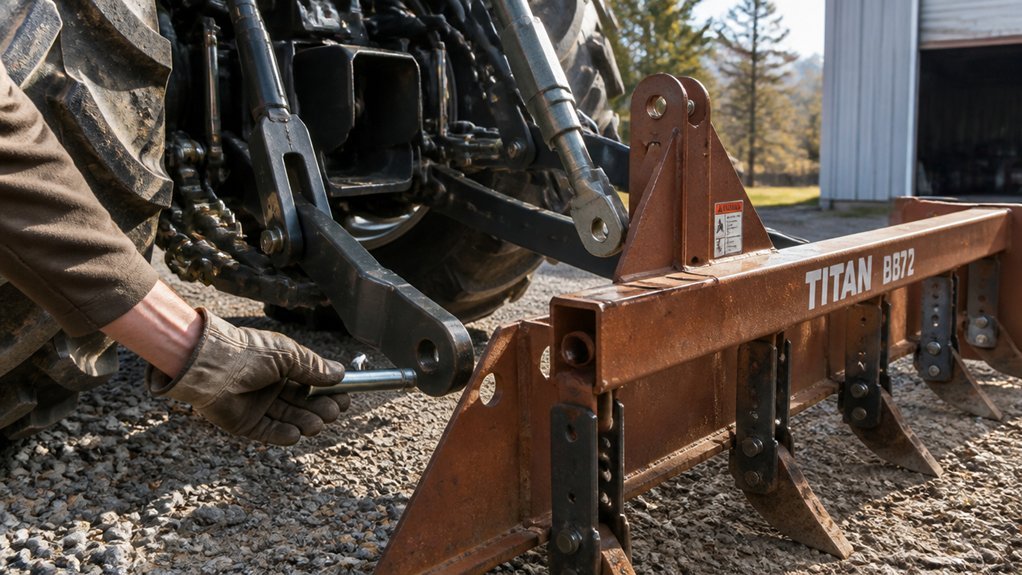
Once you’ve determined your box blade matches your tractor’s specs, move to mounting it. Verify three-point hitch compatibility and clearances per your manual, then attach the implement using your tractor’s quick-attach system or standard lower lift arms and top link. Center the box blade behind your tractor and secure all pins with clips.
During box blade setup, confirm proper weight distribution across the frame. Set scarifier position based on your immediate task—extend the tines for cutting and breaking ground, retract them fully for smoothing operations. Position the box level for initial testing.
Plan your top link adjustment strategy before beginning work, recognizing that hydraulic top links provide superior control for frequent dirt work, though manual links suffice for occasional use. Double-check all connections before engaging your tractor’s hydraulics.
Recommended Products

RANGE OF APPLICATION: Our Quick Hitch Adapter is used for Category 1, 3-point tractors such as snowplows, mowers, or boom poles and medium to large farm equipment. Enables the Category 1 Quick Hitch to be used with implements that are not made to ASABE quick hitch standards.
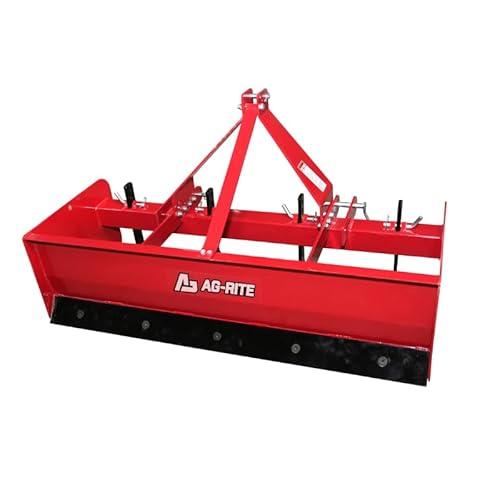
HEAVY-DUTY BOX BLADE: Built from durable 4 mm (.15 in.) steel, designed for demanding land management tasks including driveway grading, gravel redistribution, soil leveling, and property maintenance. The 320 lb frame provides the weight needed for effective ground engagement.
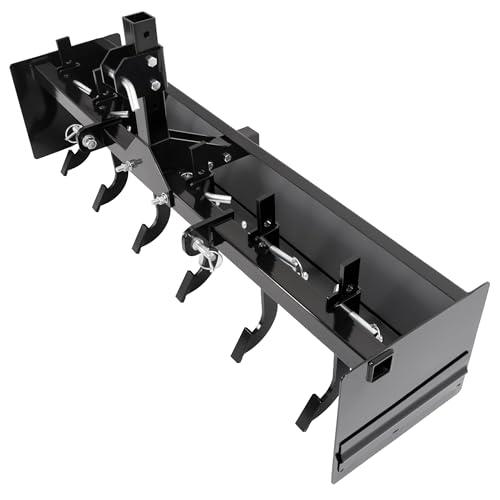
Wide application: Compatible with CAT-0 systems on your lawn or garden tractor and if you install the conversion adapter, it can also adapt to CAT 1 Three-Point Tractor. Scrape blade usually been used to remove snow from roads or surfaces, level or grade soil, prepare for planting, or for leveling construction road surfaces
How to Adjust Your Box Blade’s Top Link for Any Task
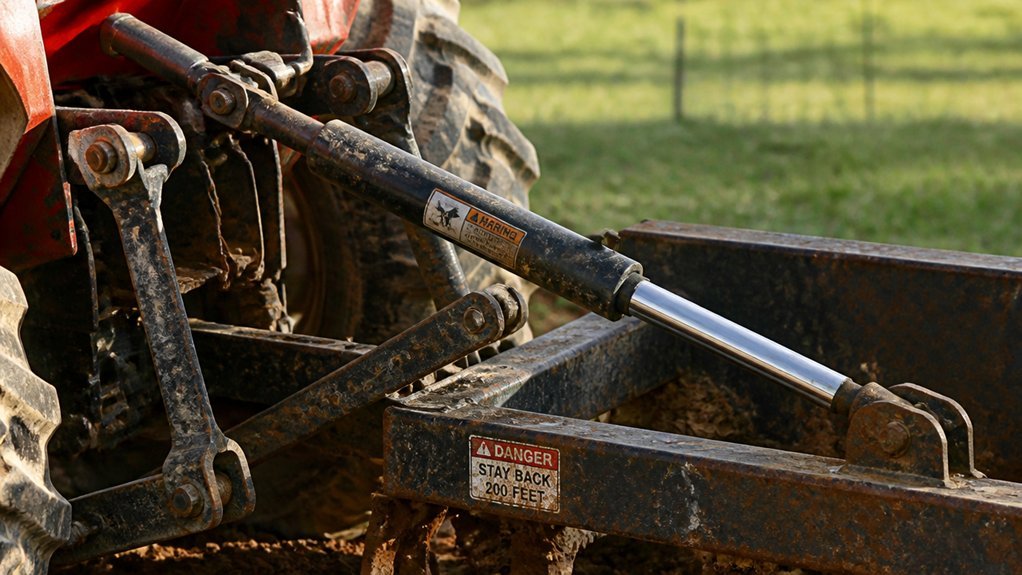
How precisely does your top link position determine what your box blade actually does? You control cutting depth and function through height adjustment of this critical linkage.
Extend your top link nearly to maximum length. You’ll position front and rear blades for minimal ground contact, creating a float position ideal for final leveling without digging. Shorten the top link aggressively when you need bite—this drops blades deeper and increases cutting depth for material removal or grading humps.
For balanced operations, maintain your top link near mid-position. This neutral setting reduces both cutting and dragging, permitting even soil redistribution without unwanted aggression. Tilt the box forward via top link adjustment to transition from cutting into floating mode, smoothing uneven terrain passively.
Hydraulic top link options provide incremental precision during continuous dirt work, though manual versions function adequately for intermittent tasks.
Recommended Products


Oregon Replacement Deck Leveling Gauge
How to Set Scarifiers for Aggressive Ground Breaking
Your top link positioning sets the stage, but scarifier depth determines whether you’re skimming soil or ripping through compacted layers. For aggressive breaking, lower your scarifiers fully and extend your top link, angling the box blade settings forward to drive teeth deep into compacted ground. This configuration maximizes scarifier penetration and exposes undisturbed material beneath. Keep your top link position near mid-range to maintain consistent scraping while breaking ground—too short reduces bite, too long lifts the blade. You’ll feel the resistance when scarifiers engage properly. Remove or retract scarifier teeth when aggressive breaking completes to prevent unnecessary disturbance or clogging. Inspect scarifier wear regularly during intensive work; replace worn teeth promptly to maintain cutting performance. Proper scarifier adjustment transforms your box blade from a finishing tool into a ground-breaking implement.
Recommended Products

Adaptation for Cat. 1-1 Tractors: The hydraulic top link cat. 1-1's rod inlet/outlet diameter: 3/8 in; Min retracted length: 8-1/8 in (460 mm); Stroke length: 8-1/4 in (210 mm); Hydraulic hose length: 30.1 in (765 mm). It can be directly installed on Cat. 1-1 tractors and is widely used in heavy-duty agricultural plowing, waste recycling, transportation, and other tasks.

Adaptation for Cat. 2-2 Tractors: The hydraulic top link cat. 2-2's rod inlet/outlet diameter: 3/8 in; Min retracted length:19-11/16 in(500 mm); Stroke length: 8-5/16 in (211 mm); Hydraulic hose length: 30.1 in (765 mm). It can be directly installed on Cat. 2-2 tractors and is widely used in heavy-duty agricultural plowing, waste recycling, transportation, and other tasks.

Adaptation for Cat. 1-1 Tractors: The hydraulic top link cat. 1-1's rod inlet/outlet diameter: 3/8 in; Min retracted length:20-7/8 in(530 mm); Stroke length: 11 in (280 mm); Hydraulic hose length: 30.1 in (765 mm). It can be directly installed on Cat. 1-1 tractors and is widely used in heavy-duty agricultural plowing, waste recycling, transportation, and other tasks.
Do You Need Gauge Wheels? (When They Help and When They Don’t)
Why install gauge wheels when you’re already managing scarifier depth and top link geometry? You’ll find gauge wheels provide a fixed reference that manual adjustments can’t match during initial leveling passes.
Set your gauge wheels to barely touch the ground on level surfaces. This maintains consistent blade-to-ground geometry and prevents the implement from lifting too high. Position them slightly lower than your cutting blades so lifts remain even without sacrificing ground contact.
Your gauge wheels excel at spreading material uniformly by lifting a fixed amount, enabling more consistent fill than dragging alone. However, they’re control tools, not finish instruments.
After initial grading, you’ll reduce reliance on gauge wheels. For final smoothing, float your 3-point hitch to follow variable terrain smoothly. Your tractor’s hydraulic float provides superior ground contact across undulations where rigid gauge wheels would create chatter and uneven cuts.
Recommended Products

Wide Compatibility: This box blade is universally compatible with CAT-0 3 point systems on your lawn or garden tractor. NOTE: Install the conversion adapter can also adapt to CAT 1 Three-Point Tractor. Can be easily attached to a wide range of tractor models

➤【Easy Assembly】Plow leg height: 18 in. Width: 8 in. Comes with complete installation accessories. In just a few steps, the box blade can be easily connected to the tractor through the four-point holes, which is simple and convenient.

Comprehensive Pack for Daily Use: equip yourself with 12 replacement box blade shank points, perfectly measured at about 5.2 x 1.3 inches, 2 inches in height each; Replace worn-out blades conveniently or share with friends and family to ensure you have enough supply for your daily requirements
How to Level High Spots and Spread Material
What depth should you cut to knock down a high spot without creating new problems? Cut only 2–4 inches at a pass when leveling high spots with your box blade. Lower the scarifiers to grind raised areas until they’re loose and level with surrounding grade. Extend your top link until front and rear blades align at similar heights—this creates balanced cutting force across both edges. You’re not gouging; you’re shaving.
Gauge wheels help when spreading material. Set them to barely skim the surface so they control lift and distribute loosened soil evenly as you advance. Drag the box blade forward to redeposit material from peaks into adjacent depressions. Move steadily. Don’t scour—transfer. After reducing highs, lift scarifiers gradually in small increments while making additional passes to smooth and consolidate the surface.
Recommended Products
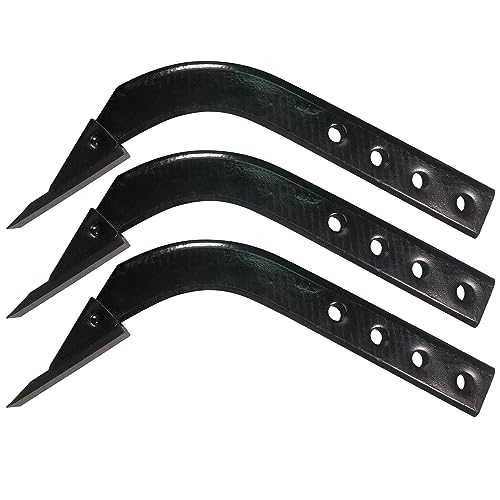
4‑Position Adjustable Shank: With an 18" shank height and 2" hole spacing (2/3" diameter), this ripper tooth gives you four distinct depth settings. Whether you need shallow grading, deep tilling, or something in between, simply adjust the hole position.

【4 Holes Adjustable】Each shank of our box blade has 4 height fixing holes for adjusting the depth of land plowing up and down. Hole spacing: 40mm(1.6"). Hole diameter: 15mm(0.6"). Box blade shank height: 18 inches.

Convenient Replacement Parts: you will receive 8 pieces of box teeth, enough for your daily use and replacement; Box teeth are designed for easy and quick replacement, making routine equipment maintenance a breeze
How to Fill Low Spots: Compact, Drag, and Finish
Once you’ve shaved down the high spots, extend your top link to guide scraped material into the low areas, letting the box fill and release soil as it scrapes forward. Set your top link so the blades angle slightly backward, capturing loose material without aggressive cutting.
Drag material purposefully across depressions rather than scouring new ground. Concentrate on shifting previously lifted soil into each fill zone, building layers gradually. You’ll avoid disturbing undisturbed base layers this way.
Compact each fill by driving over it repeatedly with the box blade lowered. Multiple passes settle the soil and eliminate voids that cause future sinking. Gauge wheels assist here—set them barely touching level ground to maintain consistent lift height while spreading and packing.
Work systematically until all depressions disappear and the surface firms evenly under weight.
Recommended Products

CATEGORY 1, 3 POINT HOOKUP: This adapter converts your Cat 1, 3 Point hitch into a quick hitch, saving you time and labor when connecting your tractor to your 3 Point implements. This quick hitch is compatible with most popular brands, including John Deere, Kubota, Massey and more.

Heavy-duty box blade crafted from reinforced carbon steel for superior durability and rust resistance.
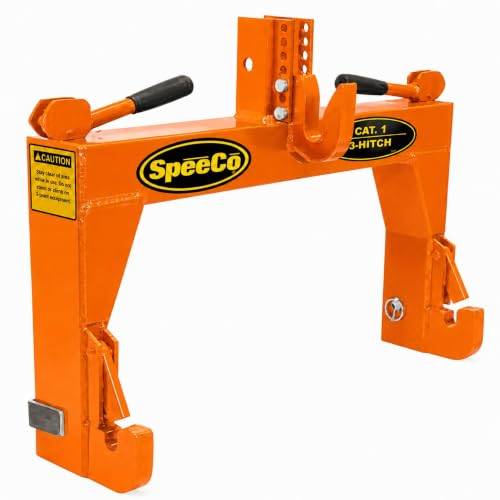
Save Time on Implement Changes: This Category 1 quick hitch helps reduce the hassle of reconnecting lift arms and top link points, making it easier to switch between common implements with less downtime
Box Blade Float Position: The Secret to Final Smoothing
How does the surface remain glass-smooth after you’ve leveled and filled every depression? You engage the float position on your 3-point hitch. This lets the box blade follow ground contours with minimal vertical movement, preventing the lift arms from fighting natural terrain variations.
When you’ve completed your broader leveling passes, shift into float. The box blade drifts along the surface without active cutting force. Lift becomes minimized, so the blades maintain close ground contact without gouging. You’re not pushing soil; you’re allowing consistent blade-surface interaction across irregularities.
For final smoothing, you’ll drive over the area to settle and compact lightly. Then make small, precise passes if needed. The float function does the work—your box blade glides, mirrors existing ground contours, and leaves behind that even, finished surface you’re after.
Recommended Products

Part Number:AM130907 490-900-0041 750-442 TY15272

✅ Complete Replacement Set – Each pack contains 3 black replacement wheel cutters and 3 blade fixation bolts, ready to install in your woodworking marking gauge.

Part Number: MOK30-0015 AM130907 TY15272 750-442 490-900-0041
Avoid These 5 Costly Box Blade Mistakes (and How to Fix Them)
Why do some operators chew through cutting edges and still end up with washboard surfaces?
You’re likely running your front blade lower than your rear blade—or vice versa. Match both blade heights and set a middle top-link position so neither edge scrapes harder than the other. You’re also wasting material if you’re not balancing blade-to-ground contact; aim for minimal, even pressure. Don’t skip gauge wheels. They control lift and spread material evenly, whereas hydraulic top links tempt you into constant, sloppy tweaks. You’re not saving time by leveling everything in one pass; knock down highs first, then fill lows iteratively. Finally, compact those filled spots before regrading, or you’ll cut deeper and rut again on the next pass.
Recommended Products

9" Body; 3/4" Ball Joints; Adjust 13" to 19" Overall

Spare Parts Holland - Hydraulic Top Link Cat 1-1 with Locking Block - Min. 18-1/8" Max. 26-3/8"
Intelligent and Strong: Premium hydraulic top link with integrated locking block technology, maintains adjusted position consistently. Features sturdy steel construction with black protective finish. Hydraulic operating pressure of 2610 PSI with 7937 Lbs push force and 5071 Lbs thrust force.
Conclusion
You’ve now got the fundamentals to run your box blade effectively. Match your hitch setup to the job, dial in that top link for precise depth control, and set scarifiers only when you’re breaking ground. Use gauge wheels for consistent grading, work highs before lows, and finish in float for a smooth surface. Avoid common errors— improper angle, excessive depth, neglected maintenance—and you’ll maintain grading accuracy while minimizing wear on your equipment.
Recommended Products

Heavy-duty box blade built from reinforced carbon steel for long-lasting durability and rust resistance.

4‑Position Adjustable Shank: With an 18" shank height and 2" hole spacing (2/3" diameter), this ripper tooth gives you four distinct depth settings. Whether you need shallow grading, deep tilling, or something in between, simply adjust the hole position.

Comprehensive Pack for Daily Use: equip yourself with 3 replacement box blade shank points, perfectly measured at about 5.2 x 1.3 inches, 2 inches in height each; Replace worn-out blades conveniently or share with friends and family to ensure you have enough supply for your daily requirements