
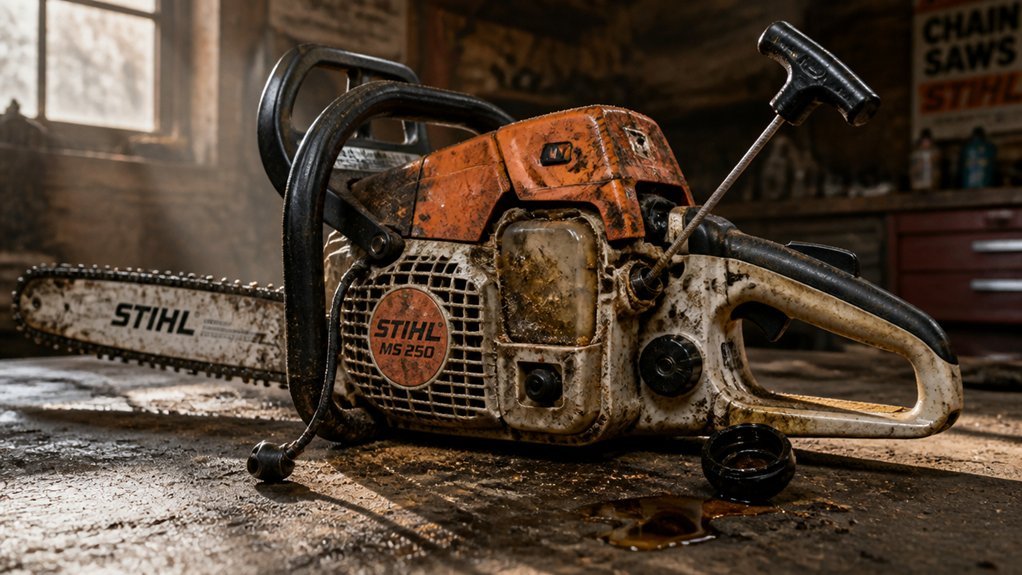
Your chainsaw sits silently when fuel degrades, airflow chokes, or spark fails. You’ll trace failure systematically—compression first, then ignition, then fuel delivery. Each system’s culprits hide in plain sight: clogged filters, fouled plugs, or worn rings await your inspection. The real question isn’t what’s broken, but which flaw you’ll find first.
Why Your Chainsaw Won’t Start: Check the Fuel First
Where do you begin when your chainsaw refuses to fire? You’ll check the fuel system first, as degraded fuel causes most starting failures.
Drain old fuel immediately—you can’t burn gasoline that’s absorbed water or oxidized. Inspect the tank; if you see separation or smell varnish, you’ve found your culprit. Refill with fresh gasoline and add stabilizer to prevent future degradation.
If fresh fuel doesn’t resolve the issue, examine fuel lines for cracks that allow air infiltration. Replace compromised lines to maintain proper pressure to the carburetor.
Next, assess the fuel filter. A clogged filter chokes flow before fuel reaches the carburetor. Replace it if you can’t blow through it easily.
Finally, evaluate the carburetor itself. Disassemble and clean it with appropriate solvent, or rebuild it using a model-specific kit when deposits restrict internal passages.
Recommended Products

Brand New replacement chainsaw fuel filter fit for Stihl, for Poulan, for Husqvarna 2 Cycle engines;

✔️Suitable for Most 2-cycle Small Engines

1 PC 753-08319 Primer Bulb for line trimmers Troy-Bilt TB685EC TB6044XP TB635EC 685EC 6044XP 635EC Trimmer, Craftsman Trimmer 316731932, 316731933, 316731934, 316740930, 316740970, Troy Bilt 41ADL6PC766, 41BDF6PC766, 41BDZ6PC866, 41CDZ6PC76
Fix a Flooded Engine Fast
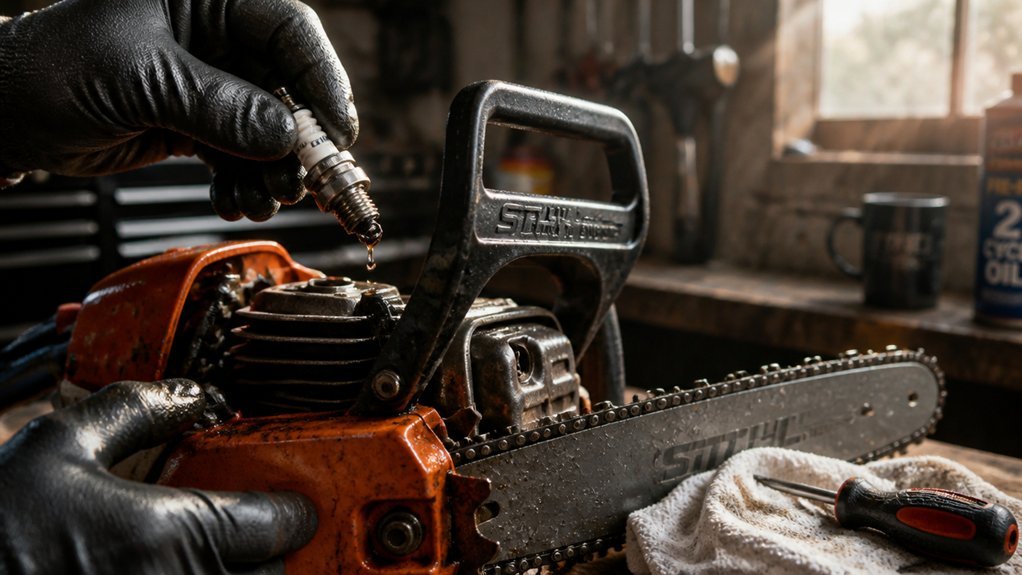
How can you tell if you’ve flooded your chainsaw’s engine? You’ll detect flooding by a strong fuel odor and a wet, fuel-soaked spark plug upon inspection. Excessive primer presses or repeated choking cause this condition, saturating the cylinder and preventing proper ignition.
Execute this anti-flood procedure systematically. Turn OFF the switch, remove the spark plug boot cap, and extract the spark plug. Dry the plug thoroughly or replace it if saturated. Fully open the choke, then pull the starter cord repeatedly to clear excess fuel from the cylinder. Refit the dry spark plug, reconnect the boot cap, and ensure the switch returns to ON. Adjust the choke appropriately, then execute several dry starts before applying throttle. This restores compression, ignition, and proper carburetion.
Recommended Products

4 Different Size Fuel Line Hose - I.D x O.D: 0.08" x 0.14" (2mm x 3.5mm), 1/8" x 1/4" (3mm x6mm),1/8" x 3/16"(3mm x5mm),3/32" x 3/16" (2.5mm x5mm) Assoreted Sizes - One Kit Covers Many Small Engine Fuel Line ID/OD combinations Includes Four Common Fuel Line Sizes
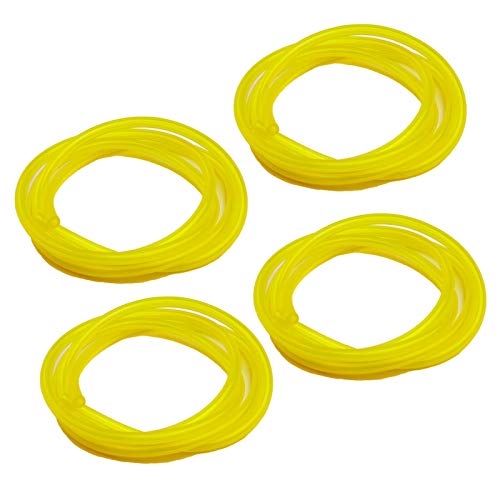
Assortment and Functional: 4 different sizes fuel hose, I.D. x O.D.- 0.08" x 0.14", 3/32" x 3/16", 1/8" x 3/16", 1/8" x 1/4". Versatility small diameter hoses, multiple sizes, more alternative.

2 Pcs Fuel filters (White)--Model: 530095646; fit for Poulan Chainsaw 2050 2150 2375 , for Craftsman Trimmer Chainsaw Blower. High quality, durable and long lasting, easy to Install. 2 Pcs Fuel filters (Black)--Model: ZF-1; Fits most Homelite chainsaws and trimmers with 1/8" I.D. fuel line etc. excellent quality, durable and long lasting
Inspect Fuel Lines and Filters for Blockages

Once you’ve cleared a flooded cylinder and confirmed ignition, direct your attention toward fuel delivery infrastructure. You’ll assess fuel lines and fuel filter integrity systematically.
Begin by tracing fuel lines from tank to carburetor. You’re looking for cracks, splits, or软ening that permit air infiltration—this causes lean starting and poor performance. Replace compromised lines immediately; they can’t be repaired reliably.
Remove and inspect the fuel filter. You’re checking for varnish deposits or debris plugging the mesh screen. Old gasoline—anything over one month—degrades into gummy residues that clog this component. If flow restricts, install a new filter.
Examine your tank interior. You’re preventing future contamination by keeping the cap area clean during fueling. Debris enters here and lodges in the filter, choking fuel delivery.
If lines and filter test clear yet performance declines, contamination has likely migrated downstream.
Recommended Products
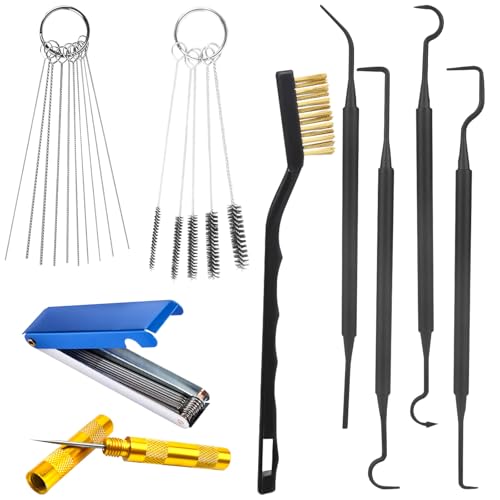
【Material】Engineered for performance and longevity, our carburetor cleaning kit utilizes high-grade stainless steel and tough nylon. The stainless steel components offer reliable strength and are designed to maintain their integrity, while the nylon brushes effectively scrub sensitive parts without causing damage. This thoughtful material selection provides a consistent and dependable cleaning experience through repeated use on various projects.

【Complete Carburetor Cleaning Kit for Deep Maintenance】 This carburetor cleaning kit comes with 3 double Head Brush 23 Needles 5 Nylon Brushes 1 Scraper and 4 Cleaning Hooks, providing all essential tools for routine upkeep and heavy-duty deep cleaning without the need for additional purchases.
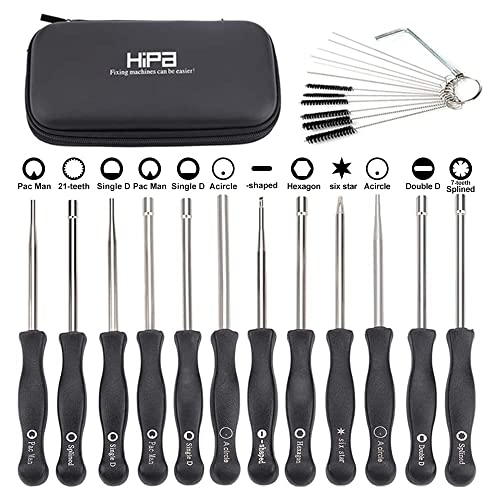
Carburetor adjustment tool kit, fits for ZAMA, STHIL, Husqvarna, Poulan, Weedeater, Echo, Homelite, Ryobi, MTD, Troy-Bilt,Toro, Sears, Ruixing, Huayi; string trimmer, chainsaw, leaf blower, hedge trimmer, edger, pole pruner and anything else that utilizes the carburetor adjustment tool.
Clean or Rebuild the Carburetor
The carburetor represents the most precise component in your fuel system, and it’s where degraded fuel causes its maximum damage. You’ll encounter starting failures when varnish, gums, and debris obstruct fuel flow through the carburetor’s calibrated passages.
Begin by removing the air filter and spraying carburetor cleaner into the intake to dissolve superficial restrictions. When symptoms persist, remove the carburetor completely. Disassemble it systematically, clearing all jets, ports, and openings with cleaner and compressed air. Adjust needle settings to factory specifications before reassembly.
If thorough cleaning doesn’t restore proper metering, you’ll need a rebuild kit—replacing diaphragms, seals, and gaskets—or install a matched replacement unit. Prevent recurrence by using stabilized fresh fuel; you’ll eliminate future varnish accumulation and maintain precise carburetor function.
Recommended Products

Often specified as original equipment, NGK spark plugs are the best combination of performance and longevity.
Check the Spark Plug for Deposits or Wear
Ignition failures often trace to a compromised spark plug, making this component your next diagnostic checkpoint. Remove the spark plug and inspect its electrodes for deposits, cracks, or heavy corrosion—conditions indicating fouling or wear. Deposits, whether carbon, oil, or fuel-related, disrupt electrical conductivity and weaken spark intensity. You’ll clean electrode surfaces thoroughly with an appropriate solvent or wire brush when contamination appears moderate, then verify the gap against factory specifications using a feeler gauge before reinstalling.
A plug saturated with fuel, severely fouled, or improperly gapped causes hard starting or complete ignition failure. When inspection reveals electrode erosion, insulator damage, or persistent fouling, discard the defective unit. Install a correctly gapped replacement of manufacturer-recommended type and heat range to restore reliable combustion.
Recommended Products

FUEL SYSTEM CLEANER: Cleanses the entire fuel system using PEA additives, including fuel injectors, lines, & fuel pumps. This advanced formula removes water, gum, and varnish, ensuring optimal performance & longevity of your fuel system while preventing corrosion.
Test for Spark at the Plug
Where does ignition actually fail? You’ll test for spark at the plug to isolate the fault.
Remove the spark plug boot and disconnect the ignition wire. Ground the metal body of the spark plug against the engine cylinder. Pull the starter cord while observing the plug gap. A strong, bright blue-white spark indicates good ignition. A weak, orange, or yellow spark suggests a failing coil, worn plug, or compromised wiring.
If there’s no spark, inspect the spark plug for deposits or corrosion; replace it if necessary before retesting. When the plug is clean yet produces no spark, verify ignition by manually grounding the plug and checking continuity through the coil, ignition wire, and boot cap to locate faults. After confirming spark at the plug, reassemble and attempt starting, correlating spark presence with engine behavior to advance your diagnosis.
Replace the Ignition Coil If There’s No Spark
Why does spark remain absent after you’ve swapped the plug and verified the wiring? You’ve confirmed the plug fires correctly when grounded, yet the cylinder receives no spark during operation. This indicates coil failure.
Test the ignition coil by measuring primary and secondary resistance with a multimeter against manufacturer specifications. You’ll find infinite resistance or readings outside tolerance confirm internal winding damage. A faulty coil produces no spark or intermittent sparking that disappears under compression.
Replace the ignition coil when other ignition components test functional. Coil replacement proves more cost-effective than extensive diagnostic procedures when you’ve eliminated the plug, boot cap, and wiring as failure points. After installing the new coil, verify plug wire security and re-check timing alignment. Confirm spark returns before attempting restart.
Clean the Spark-Arrestor Screen
How else might airflow restriction choke your engine when ignition components check out? Examine your spark arrestor. This mesh screen traps carbonized oil and fuel residue, progressively obstructing exhaust airflow until combustion gas backpressure stalls ignition.
Remove the screen from the muffler assembly. Inspect the mesh for hardened deposits—evidence of low-quality lubricant or overly rich mixture. Scrub vigorously with a wire brush until all blockage clears completely. Verify unobstructed passages before reinstallation.
Prevent future clogging by switching to high-quality synthetic oil that combusts cleanly and adjusting your fuel mix toward leaner settings. These measures minimize sludge accumulation on the screen.
Restore adequate airflow through this component and you’ll eliminate starting failures and rough idle symptoms tied to exhaust restriction. Periodic spark arrestor maintenance sustains reliable engine operation.
Recommended Products

Are you annoyed that some tight spaces cannot be cleaned up? Congratulations on finding the one you want. 5 different width Nylon Brushes + 10 different diameter Cleaning Needles + 13 different diameter Cleaning Wires can help you clean out the blockages that you can't see. You do not need to dirty your beautiful hands. This set of tools can easily help you clean up the corners that bother you,MAKE YOUR WORK EASY..

Hipa pack of 14 carburetor adjustment tool compatible with ZAMA, Walbro, STHIL, Husq-varna, Craftsman, Poulan, Weedeater, Echo, Homelite, Ryobi, MTD, Troy-Bilt, Toro, Sears, Ruixing, Huayi; string trimmer, chainsaw, leaf blower, hedge trimmer, edger, pole pruner and anything else that utilizes the carburetor adjustment tools.

ALL-IN-ONE CARBURETOR CLEANING KIT: Includes 13 Stainless Steel Wires, 10 Cleaning Needles, 5 Nylon Brushes, 1 Sharp Pick - All In Various Diameters. Efficiently Cleans Small Orifices And Tight Channels In Carburetors, Nozzles, And Throttle Bodies
Test Engine Compression
Since ignition and fuel delivery components appear functional, you’ll now verify whether adequate cylinder pressure exists to sustain combustion.
Ensure the engine sits cool with no fuel in the carburetor to guarantee accurate readings. Remove the spark plug and seal your thumb over the cylinder opening; pull the starter cord forcefully. Strong air pressure should resist your thumb—weak or absent pressure signals worn piston rings or cylinder damage.
For precise measurement, thread a compression gauge into the spark plug port and crank the starter cord several times. Compare your reading against manufacturer specifications; substandard values confirm internal wear. You’ll then perform a leak-down test to isolate whether piston rings, valves, or head gasket sealing causes the compression loss. Rapid pressure drop during operation indicates scored cylinders or carbon buildup, necessitating rebuild.
Recommended Products

【WITH 2-IN-1 CHAINSAW WRENCH】- The chain saw scrench is made of quality steel, durable and not easy to deform, the weld is also hard to break. One tool to remove bar nuts, tank caps, spark plugs, air filter covers and adjust chain tension. Socket wrench mouth are 13mm and 19mm.
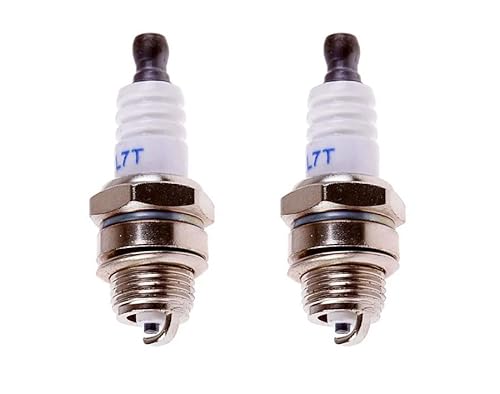

Replaceable Models - Optimum quality spare par compatible with NGK BPMR7A, BPM7A, BM6A, L7T and so on. Also fit for Champion CJ8, RCJ6Y, RCJ7Y, CJ7Y, RCJ8 and for Bosch WSR5F, WS8E series sparkplug.
When to Call a Pro for Starting Issues
Compression testing narrows engine problems to mechanical wear, but your diagnosis isn’t finished if the saw still won’t fire or run reliably. You’ll need to evaluate ignition and fuel systems systematically. If you’ve verified spark at the spark plug yet the engine won’t start, test the coil, spark plug wire, and boot cap—failures here require professional equipment to diagnose accurately. When ignition checks pass and fuel quality is confirmed, suspect carburetor malfunction; internal passages may need ultrasonic cleaning or model-specific rebuild kits you shouldn’t attempt without training. A spark plug that stays wet after repeated starting attempts signals flooding—execute anti-flood procedures, but recurring saturation demands expert intervention. Low compression readings or electric models with motor brush failures also exceed home repair scope; you’ll need service-center diagnostics for these mechanical and electrical faults.
Recommended Products

On-machine carburetor, injector, & internal engine component cleaning


Fuel stabilizer for long-term storage of boats, generators, lawnmowers, and other powersports equipment
Conclusion
You’ll diagnose starting failures through systematic elimination. Test compression first—you need adequate pressure for combustion. Verify spark strength next; weak or absent ignition demands coil or plug replacement. Inspect fuel freshness, line integrity, and filter cleanliness. Address carburetor flooding or varnish buildup with cleaning or rebuild. Replace the spark-arrestor screen if it’s carbonized. When internal damage or persistent fuel system faults exceed your tools or expertise, engage a qualified technician.