You’re standing on bare soil, ready to transform it into lawn, but rushing this project rewards you with patchy failure. Success demands precise sequencing—grading for drainage, balancing pH, selecting appropriate cultivars, and managing moisture through germination. Miss one critical step, and you’ll discover why so many renovations fail within the first season. The difference between sparse disappointment and dense turf lies in the details ahead.
Fall or Spring: When to Plant Grass Seed for Your Lawn
When should you plant grass seed? You’ll achieve optimal results with cool-season grasses by planning around fall planting or spring planting schedules. Early fall delivers superior seed germination because warm soil temperatures combine with cooler air and reliable rainfall, preventing desiccation. You’ll find Massachusetts conditions particularly favorable during this window.
If you’re unable to plant in autumn, you’ll select spring planting as your secondary option, targeting periods when daytime temperatures reach 60–75°F. You’ll complete soil preparation before sowing regardless of season, ensuring your seedbed is ready.
You’ll avoid summer heat and winter frost extremes for cool-season varieties. When establishing new lawns, you’ll coordinate timing precisely with seasonal conditions to maximize establishment success.
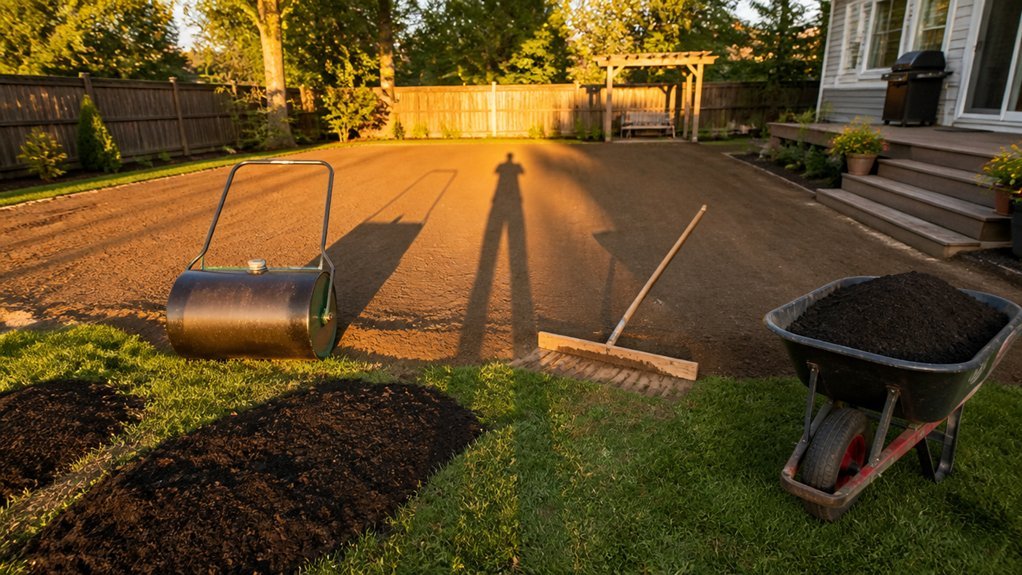
How to Grade Your Site for Proper Drainage
Selecting the right season for planting sets the foundation, but you’ll compromise those efforts without proper site grading. You’ll establish drainage away from buildings using a 1–2% slope—roughly 1–2 inches per 100 feet—to prevent pooling and erosion from water runoff.
Remove old turf if you’re replacing an existing lawn, then adjust the grade with topsoil as needed. Your seedbed must be uniform and well-drained. Complete your leveling carefully, eliminating all depressions and high spots where standing water accumulates.
Work sectionally, grading and leveling one area at a time to prevent soil hardening and maintain consistent drainage across the entire lawn. After grading, allow the soil to dry adequately before sowing. You’ll protect your seedbed from rapid wetting or erosion that washes away seeds.
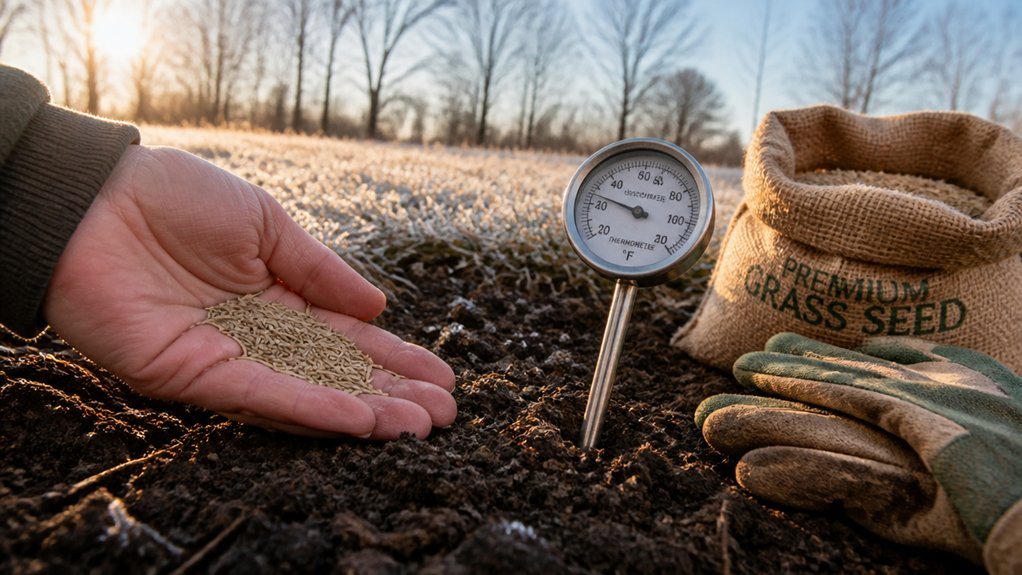
Test Your Soil pH Before Breaking Ground
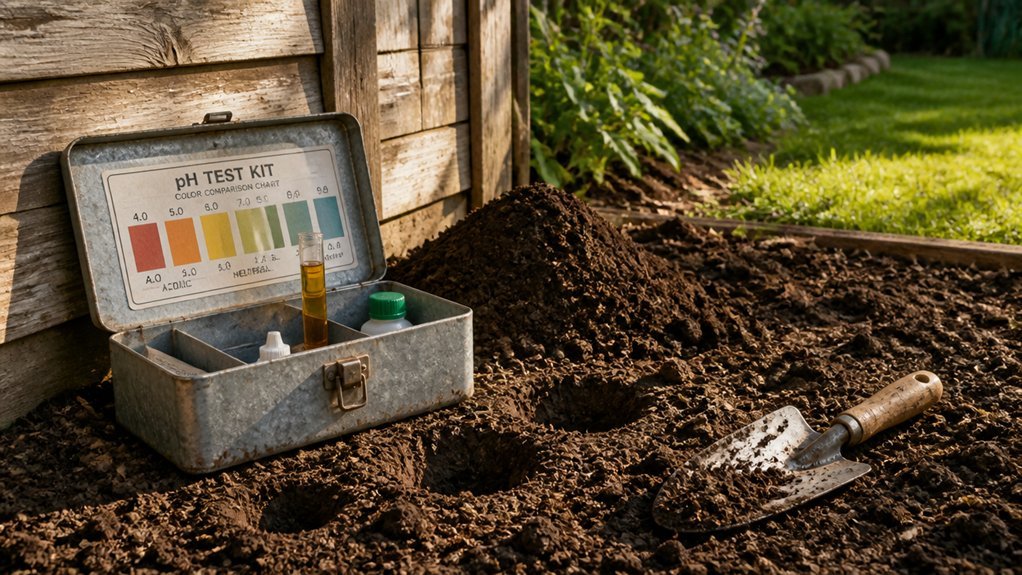
Why risk poor germination and weak establishment after all that grading effort? You’ll optimize grass seed establishment when your soil pH falls between 6.0 and 7.5. Submit soil samples to a reputable lab or extension office for soil testing before you move forward.
Your test results direct precise amendment strategies. If your soil pH runs too low, you’ll apply lime to raise it. If it’s too high, you’ll incorporate elemental sulfur to lower it gradually. Follow label rates exactly as your test recommends.
Soil testing also exposes nutrient imbalances beyond pH, letting you select appropriate fertilizers rather than guessing. After initial amendment, you’ll re-test soil pH every three to four years or following major treatments to verify conditions remain optimal. You’re investing effort—make it count from the start.
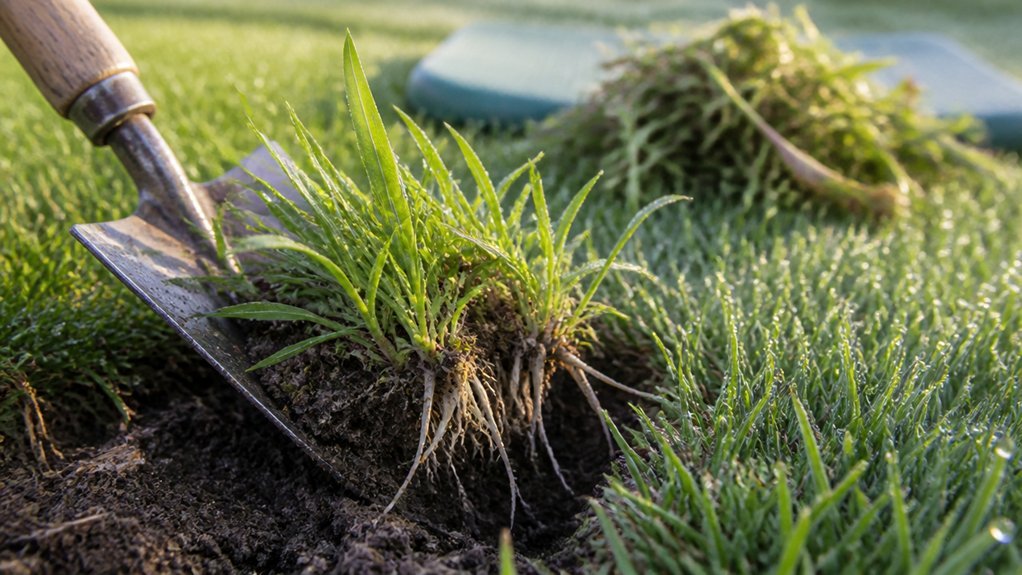
Till the Whole Lawn or Just Compacted Spots?
With your soil pH dialed in, you’re ready to prepare the physical seedbed—but don’t assume the entire lawn needs equal attention.
Tilling the whole area isn’t always necessary; you’re better off working section-by-section to loosen soil only where needed without overworking undisturbed areas.
If you’ve identified compacted spots, target those specifically with a small tiller or hand tools.
Avoid deep tilling after seeding—it disrupts seed-to-soil contact and proper seed placement.
This section-by-section approach prevents soil hardening after rainfall and maintains consistent moisture for optimal germination.
Once you’ve addressed compacted areas, lightly rake and fold the loosened soil to create a smooth seedbed preparation surface.
You’re now positioned for uniform seed distribution and proper establishment without unnecessary labor or risk of burying seeds too deep.
Pick the Right Seed Mix for Your Climate and Use
How do you guarantee your new lawn actually survives the seasons? You select seed mixes engineered for your specific conditions. For drought resistance and superior performance, you’ll choose premium Pennington Smart Seed grasses over generic alternatives.
You’ll plant cool-season grasses—Kentucky bluegrass, tall fescue, perennial ryegrass—in early fall or spring, with early fall optimal in regions like Massachusetts.
You’ll sow warm-season varieties when temperatures sustain 80°F and frost risk has passed.
You’ll deploy region-specific mixes formulated for the Midwest, Northeast, Pacific Northwest, and Pennsylvania State areas to ensure genetic adaptation.
For light conditions, you’ll apply shade/sun mixtures: Dense Shade seed mix for heavy canopy cover, Sun & Shade mix for variable exposure.
You’ll match product to purpose, climate, and microenvironment.
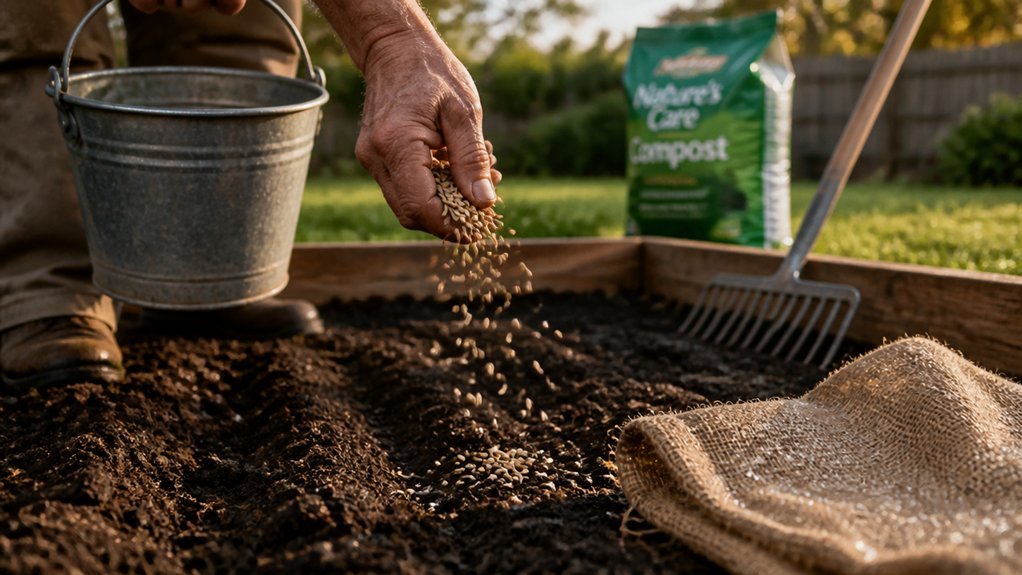
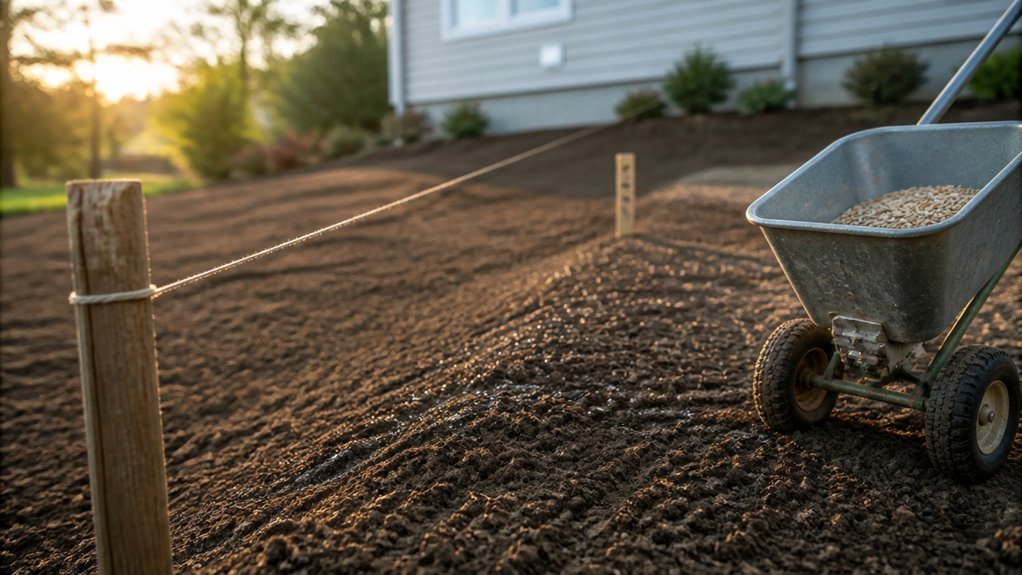
How to Spread Seed and Ensure Good Soil Contact
Once you’ve selected the right seed mix for your conditions, you’ll need to focus on proper application technique to maximize germination rates.
Load your seed spreader and distribute seed evenly across the prepared soil surface, overlapping slightly to prevent gaps.
Apply a starter fertilizer before or during seeding to fuel early root establishment.
Use light raking to incorporate seed to a depth of roughly 1/4 inch—any deeper and you’ll deprive seeds of light needed for germination.
Follow with a broom or rake to press seed firmly into the soil, maximizing seed-to-soil contact critical for moisture uptake and germination success.
Maintain soil moisture by keeping the surface damp, not saturated, throughout the 5–21 day germination window.
Consistent irrigation prevents drying that halts emergence without encouraging rot.
Monitor daily, adjusting frequency based on temperature and wind exposure.
Mulch With Straw (Not Hay) to Protect Germination
A light straw mulch shields germinating seeds from soil moisture loss, temperature swings, and scouring rain. You’ll secure critical germination protection during lawn renovation by applying wheat straw—not hay—in a criss-cross pattern to cast intermittent shade without smothering seeds.
The straw vs hay distinction matters: hay contains seed heads that introduce weeds, while clean wheat straw offers pure coverage. You’ll preserve seedling moisture and reduce evaporation as the mulch blankets your seeded area, particularly under hot sun. Apply generously enough to obscure soil color without creating dense mats.
After germination, leave the straw in place. It decomposes gradually, potentially improving soil texture and fertility while you continue establishing your new lawn. Proper straw mulch application directly supports healthy, uniform emergence.
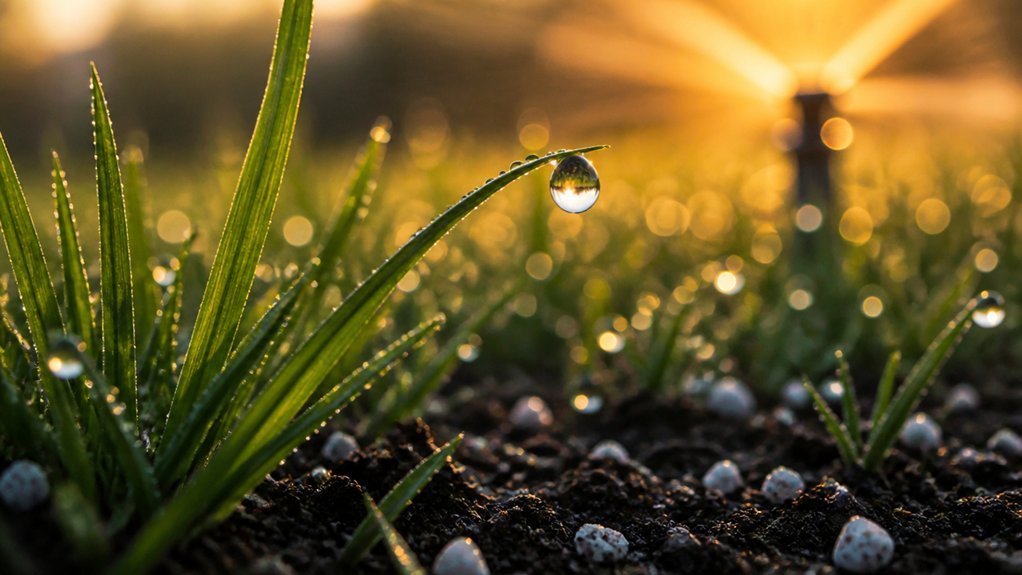
Water New Seed Without Washing It Away
Where should you focus your attention immediately after mulching? You must establish a watering technique that protects your seed investment. You’ll apply a fine-mist spray to saturate the top quarter-inch of soil without triggering erosion. You’re targeting 2–3 light applications daily, adjusting frequency upward during hot, sunny periods to sustain moisture retention throughout critical seed germination phases.
You’ve built surface tolerance by mulching with straw, but you’ll still halt irrigation at first sign of puddling. You’re allowing slight drying between sessions to drive root anchorage deeper. You’ll reduce frequency as seedlings establish, transitioning toward deeper, less frequent cycles. You’re monitoring consistently—your vigilance prevents waterlogging while maximizing the moisture retention your straw layer provides.
Conclusion
You’ve prepared your seedbed, selected appropriate seed, and protected your investment with straw mulch. Maintain consistent moisture through germination, adjusting irrigation to prevent erosion. Monitor establishment and address bare spots promptly. With proper timing, soil preparation, and attentive watering, you’ll develop durable turf tailored to your climate and use requirements. Your proactive management directly determines long-term lawn performance.