You’ll need to identify your battery chemistry before selecting a charger, as lead-acid and lithium-ion systems require incompatible voltage profiles and termination methods. Match your charger to the specifications printed on the battery case, then prepare a dry, ventilated workspace away from ignition sources. The procedure that follows prevents thermal runaway, sulfation, and premature cell failure—but one incorrect connection sequence can damage your charging equipment or the battery itself.
How to Charge a Riding Mower Battery Step by Step
Whether you’re reviving a depleted mower after winter storage or simply maintaining readiness, charging your riding mower battery demands attention to chemistry and voltage. First, identify your lawn mower battery type—lead-acid or lithium-ion—and confirm it’s 12V. Select an automatic charger matched to that chemistry.
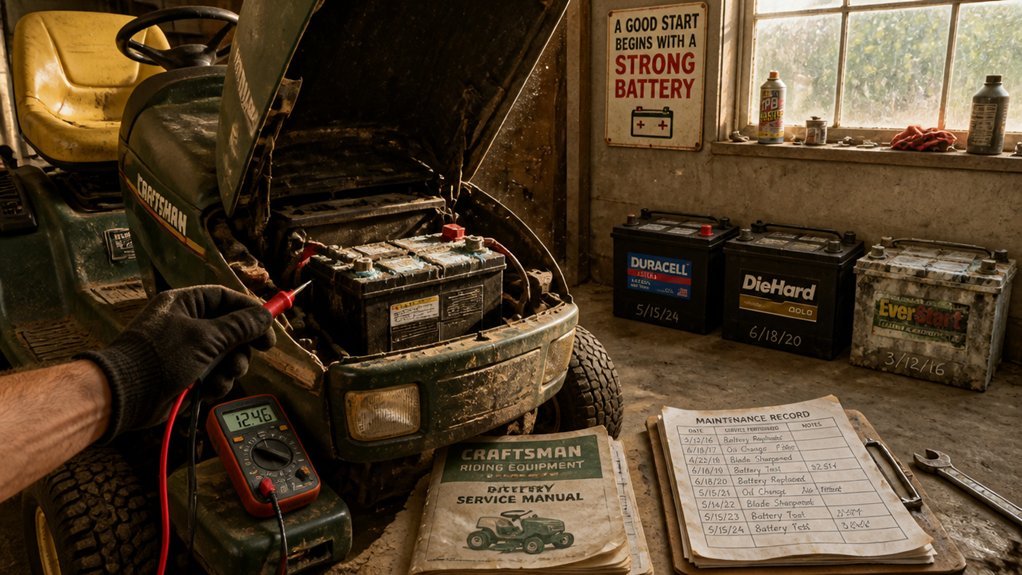
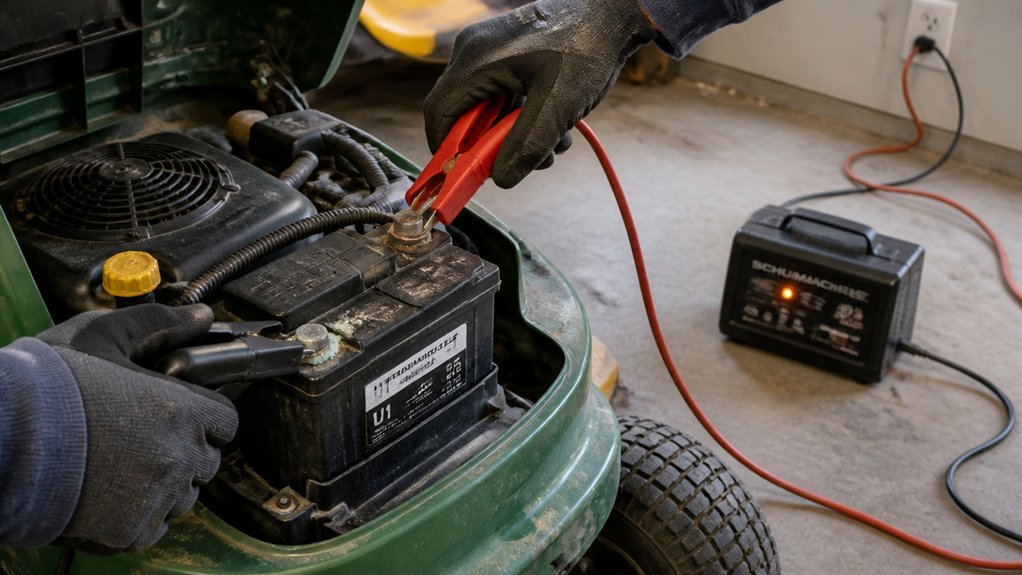
Observe safety precautions: work in a dry, ventilated area away from flammable materials. If charging in place, disconnect all power sources first. Attach charger clamps—red to positive, black to negative—ensuring secure connections. Monitor battery voltage periodically with a voltmeter; a healthy 12V battery reads approximately 12.6V.
After charging completes, unplug the automatic charger, then remove clamps in reverse order. Reinstall the battery if removed, and verify the mower starts reliably before operation.
How Long Does Charging Take?
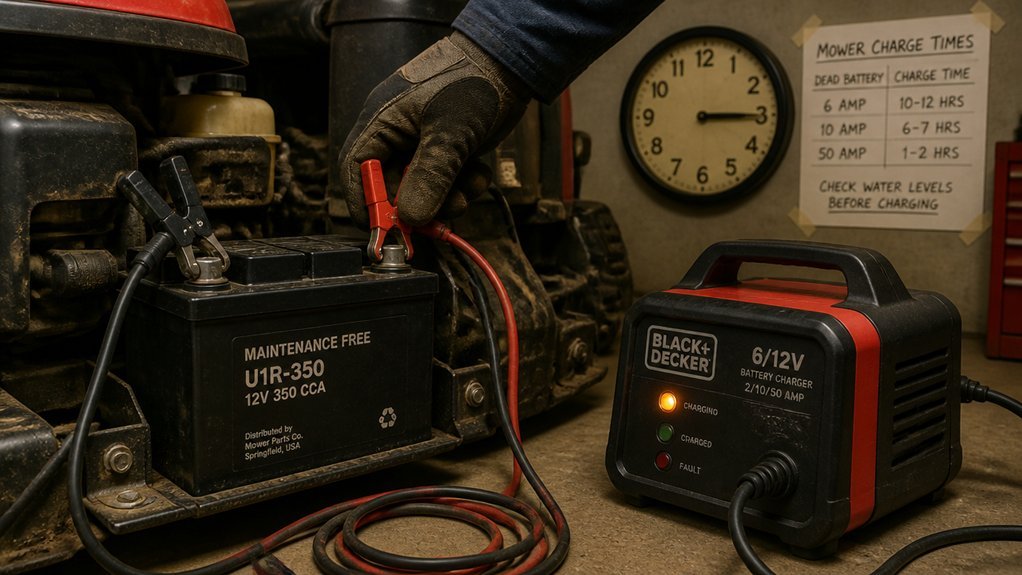
You’ve prepared your battery and connected the charger correctly; now you’re waiting for the charge cycle to complete. The charging duration for a typical riding mower battery spans 4–8 hours when you’re using a charger equipped with automatic shutoff. You’ll achieve optimal results charging your lead-acid battery at low current—approximately 2–10 amps—particularly with manual units lacking automatic features.
Monitor voltage throughout the process; you’re targeting roughly 12.6V for a fully charged 12V battery. If you’ve started below 12.4V, expect your charging time to extend accordingly.
For off-season storage, don’t rely on intermittent charging. Instead, connect a battery maintainer to preserve full charge and prevent sulfation. This approach eliminates guesswork about charging time while protecting your investment during idle periods.
Test Your Battery: Confirm a Full Charge
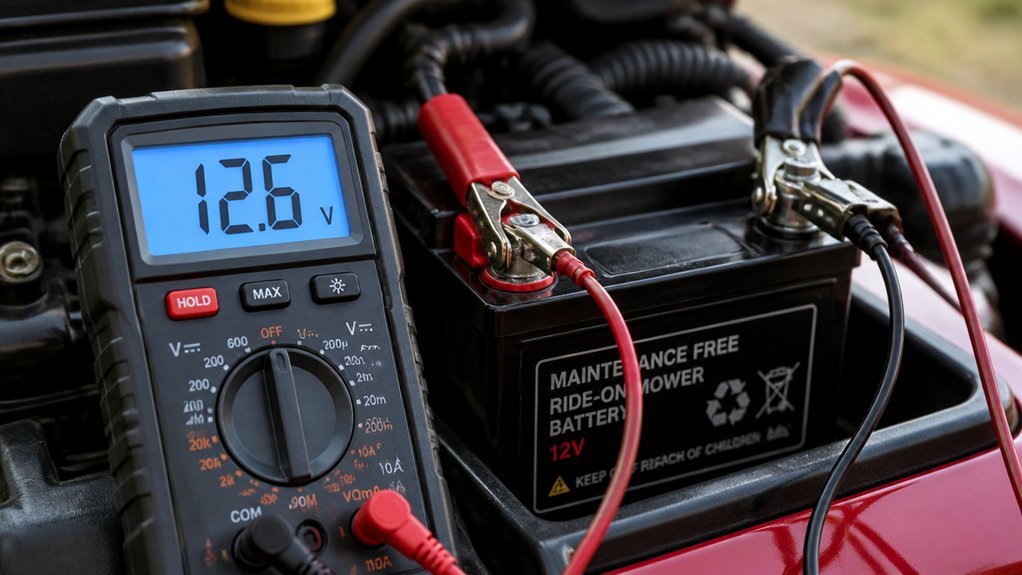
How do you know your battery’s truly ready? You’ll perform charge verification using a voltmeter. Set your voltmeter to DC voltage. Touch the red lead to the positive terminal and the black lead to the negative terminal. A fully charged lawn mower battery displays approximately 12.6 volts on your test charge reading. This no-load voltage confirms successful charging.
You’ll identify a healthy battery when readings exceed 12.4 volts. Drop below this threshold, and you’ll need additional charging. You’re measuring no-load voltage—no electrical draw during testing. If your battery won’t maintain 12.6 volts or repeatedly falls below 12.4 volts after charging, it’s failed. For 6 volts systems, you’ll adjust expectations, though most riding mowers use 12-volt architecture. Don’t confuse 4 volts discharge indicators with proper testing procedures. Record results for ongoing battery maintenance documentation.
Recheck voltage after five minutes to confirm charge stability.
Safety Gear and Ventilation for Battery Charging
Where should you charge your riding mower battery? You’ll select a dry area with adequate ventilation to disperse hydrogen gas released during venting. Lead-acid batteries produce this flammable gas, so you’re minimizing fire risk by ensuring airflow throughout the charging area.
You’ll don proper safety gear before handling any battery. Wear protective gloves to shield your hands from corrosion and acid. You’ll also use eye protection to guard against splashes and sparks. Keep all ignition sources—flames, cigarettes, and equipment that generates sparks—well away from the battery.
You’re checking that the battery surface remains dry before connecting clamps. You’re positioning yourself to monitor the process without hovering directly over the unit. You’ll maintain this controlled environment until charging completes, ensuring hydrogen concentrations never reach explosive levels near your work space.
Signs Your Riding Mower Battery Needs Charging
Several indicators reveal when your riding mower battery requires charging. You’ll notice starting issues: sluggish cranking, clicking sounds, or complete engine failure point to insufficient charge. Dim or non-functional headlights and displays also signal low capacity.
Perform a voltage test using a voltmeter. Your 12-volt battery should read approximately 12.6 volts; measurements below 12.4 volts indicate you must recharge. Watch for corrosion on terminals, which impedes electrical flow and mimics depletion symptoms.
Document these signs before proceeding. If your battery won’t hold voltage after charging, or fails to reach proper battery voltage during testing, it’s likely degraded beyond recovery.
Use an appropriate automatic charger matched to your battery chemistry. This ensures safe, complete charging and confirms readiness for reliable starting. Monitor post-charge voltage to verify successful restoration before operation.
How Often to Charge: Season-by-Season Schedule
Although your riding mower’s alternator handles most charging during active use, you’ll need a deliberate schedule to maintain optimal battery health across seasons. Establish a season schedule that prioritizes in-season maintenance checks every few weeks. Monitor battery voltage regularly; perform a voltage check to verify it maintains ~12.6 volts when fully charged. If battery voltage drops below 12.4 volts, adjust charge timing immediately and connect an automatic charger matched to your battery type—lead-acid battery or lithium-ion battery specifications differ, so confirm compatibility. Watch for sluggish cranking or dim displays during operation. Consistent vigilance prevents startup failure and eliminates reliance on occasional use. Integrate these checks into your riding mower routine, and you’ll sustain reliable performance without unexpected power loss throughout the cutting season.
Winter Storage Mistakes That Kill Mower Batteries
Why do so many riding mower batteries fail to survive winter? You invite sulfation when you skip a full pre-storage charge. Lead-acid batteries demand recharging every few weeks; lithium batteries need monthly top-ups or a battery maintainer. You must disconnect the battery, keep terminals clean, and watch for corrosion on negative posts that blocks current flow. Store in a cool dry space—room temperature suits lithium batteries; a battery box on a workbench works. You can’t charge during storage using mismatched chemistry chargers; select automatic chargers suited to your battery type. Perform a voltage check periodically—target ~12.6V for healthy 12V lead-acid units—and top up before deep discharge develops. Ignoring these steps guarantees spring failure.
Conclusion
You’ve identified your battery chemistry and selected a matched charger. You’ve secured a dry, ventilated workspace, disconnected mower power, connected red to positive and black to negative terminals, monitored voltage until reaching 12.6V no-load, then disconnected in reverse sequence. You’ve verified reliable starting. Follow this procedure each charging cycle, maintain seasonal charging schedules, and avoid winter storage errors to maximize battery service life.