You’ll start a gas pressure washer through a precise sequence of mechanical steps, each one critical for both performance and safety. First, you check your fuel level, oil condition, and workspace ventilation. Then you connect your hoses, clear air from the lines, and configure the choke and throttle. But before you pull that starter cord, there’s one preparatory step that prevents catastrophic pump damage—and you’re about to find out why it matters.
What You Need to Start a Gas Pressure Washer
What do you need before starting a gas pressure washer? You’ll need a flat surface, a debris-free water strainer, a non-potable garden hose, and a high-pressure hose with a compatible gun/wand nozzle. Verify your model’s attachment mechanism: RB 400/600/800 units use a plug-in collar; RB 200 uses a screw-on fitting.
You’ll execute start-up steps systematically. Position the unit on level ground. Connect the garden hose to the inlet and the high-pressure hose to the water outlet. Purge air from the system by filling the hoses and squeezing the trigger until water flows steadily from the nozzle.
For start-up, you’ll open the fuel valve, move the choke to the open position, set the throttle to full, and ensure the engine switch is ON before engaging the starter.
Run Safety Checks on Fuel, Oil, and Ventilation
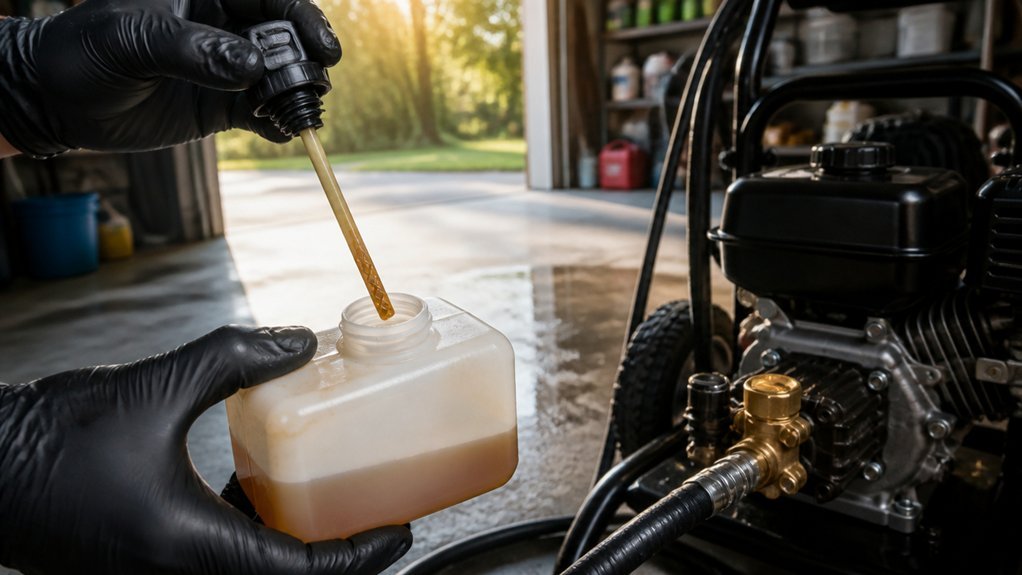
Before starting the engine, how thoroughly have you inspected the fuel, oil, and surroundings? You’ll need to verify that the fuel is clean, uncontaminated, and that you’ve opened the fuel valve. These steps help prevent engine damage and ensure reliable startup.
Check the oil level and condition, making sure it sits within the recommended range and isn’t degraded or low. Proper lubrication is best suited for optimal performance.
Confirm adequate ventilation around the unit to avoid fume accumulation and support safe combustion. Clear the air intake and engine compartment of obstructions, debris, and flammables. Finally, ensure the surrounding area is clear of bystanders and distractions, and establish a clear escape path for potential startup failures.
Connect Hoses and Attach the Spray Wand
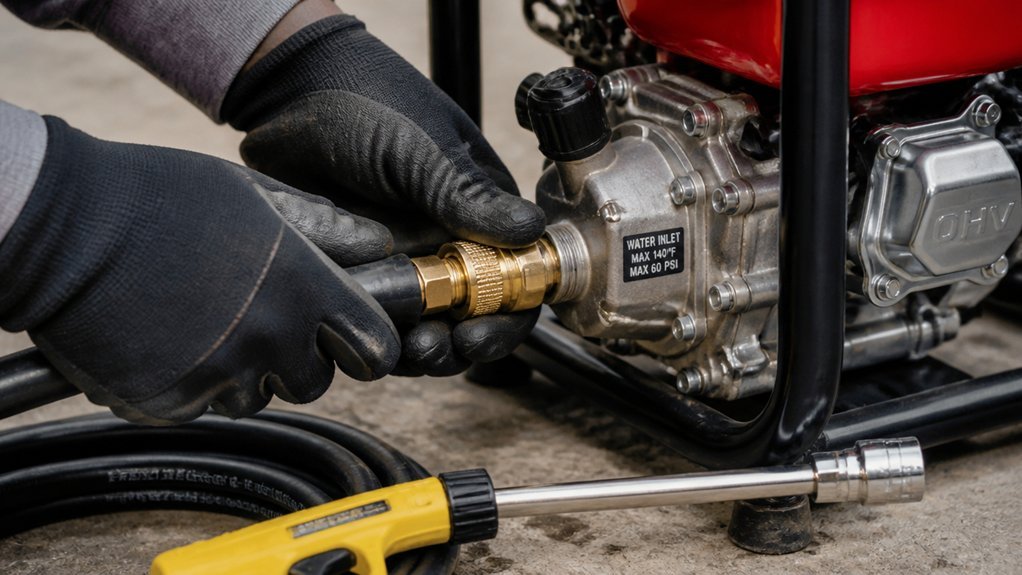
Attach the nozzle to the gun/wand assembly by pulling back the collar, inserting the nozzle, and releasing the collar until it snaps firmly into place. Connect the high-pressure hose to the water outlet on the pressure washer unit. Verify you’ve threaded the connection tightly to prevent leaks under pressure.
Attach your garden hose to the washer’s water inlet. Ensure the water strainer sits properly in place and contains no debris. Turn the water supply on fully. Let water flow through the system until the hose fills completely.
Confirm all connections seat securely before proceeding. You’ll purge trapped air from the lines next, but first verify water runs steadily through the supply hose and the high-pressure hose remains properly coupled at both ends.
Clear Trapped Air From the Lines First
Once you’ve verified all connections are tight, you’ll purge trapped air from the pressure washer system to prevent pump damage and guarantee proper operation. Fill the hose completely with water before starting the engine or pump.
Squeeze the trigger on the gun to release trapped air and allow water to flow freely through the nozzle. You’ll ensure the system achieves full water saturation and maintains consistent flow at the nozzle before proceeding.
If you detect spitting water or residual air pockets after the initial purge, repeat the trigger pull several times. You’ll confirm zero remaining air exists throughout the hose system prior to engaging any start procedures for the gas-powered unit.
This systematic de-aeration eliminates cavitation risk and protects the pump’s internal components from dry-run damage.
Set Choke, Throttle, and Open the Fuel Valve
Where should you begin with the engine controls? You’ll set the choke, throttle, and fuel valve in sequence before ignition.
First, move the choke lever fully left to the open position. This enriches the air-fuel mixture for cold-start combustion.
Next, shift the throttle lever left to the full-throttle position—you’ll need maximum engine speed for reliable starting.
Then turn the fuel valve to ON, permitting gasoline flow from tank to carburetor. You’ll eliminate fuel starvation risk this way.
Finally, switch the engine control to ON, energizing the ignition coil and starter circuit.
You’ll complete these four steps methodically: choke left, throttle left, fuel valve on, engine switch on. Each control interfaces with a specific engine subsystem, and you’ll verify each setting visually before proceeding.
Pull the Starter Rope to Fire the Engine
Grip the starter handle firmly and plant your feet shoulder-width apart on level ground, keeping the pressure washer stable against the pull force you’re about to generate. Pull the starter rope smoothly and decisively until you feel resistance, then complete a sharp, full stroke to engage the flywheel and fire the engine. Don’t jerk or yank abruptly—this’ll damage the recoil mechanism. Release the handle and let the rope retract fully; never guide it by hand.
Repeat this sequence with controlled, consistent pulls. If the engine hasn’t fired after five or six attempts, stop. Recheck the choke position, inspect the spark plug for fouling, and examine the air filter for blockage. Clear any issues before resuming the starting procedure. Once the engine catches, it’ll transition from cranking to sustained operation.
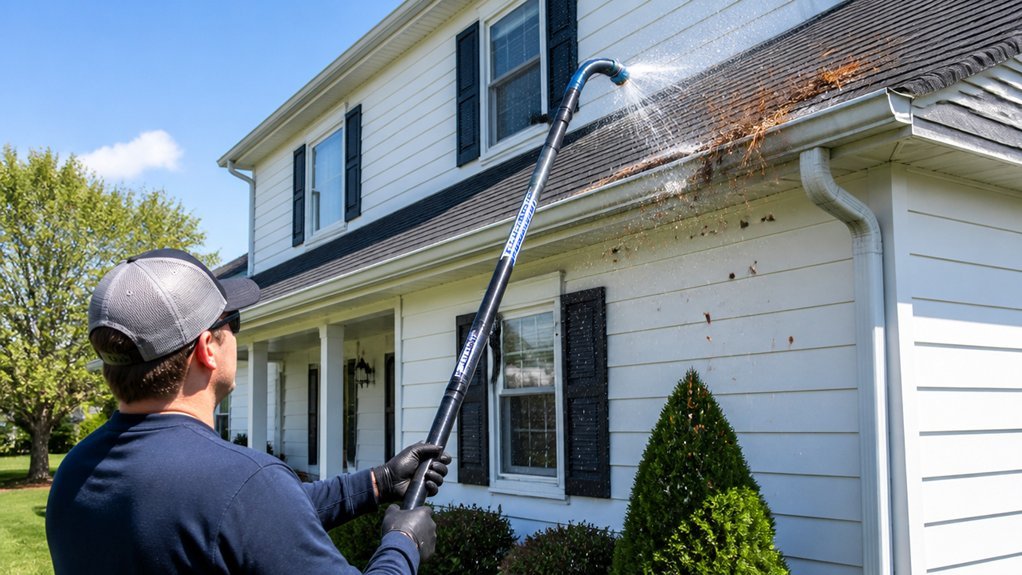
Match the Nozzle to Your Cleaning Surface
Why risk damaging your property when the right nozzle makes all the difference? You’ll select your nozzle based on spray pattern and pressure requirements. For stubborn grime, you’ll choose a 0-degree nozzle; for delicate surfaces, you’ll opt for a 25-degree–40-degree wider spray. You’ll never apply high-pressure nozzles to fragile materials—wood siding and plants require wider angles to reduce impact.
Before starting, you’ll verify the nozzle snaps securely into the gun/wand assembly, ensuring consistent spray and operational safety. For concrete and hard surfaces, you’ll deploy pressure-capable nozzles while maintaining an 8–12 inch standoff distance to prevent etching. You’ll begin testing with a low-pressure nozzle, escalating to higher-pressure configurations only after confirming the surface tolerates the force without visible degradation.
When the Engine Won’t Start: Quick Fixes
How often does a cold engine refuse to fire despite your best efforts? Confirm the fuel valve sits open, the choke rests in the open position, the throttle reaches full throttle, and the engine switch reads ON before you pull the starter cord. Check you’ve got sufficient fuel and clean, fresh gasoline.
A flooded carburetor demands you wait one to two minutes, reset the choke, and retry. Inspect your air filter—you’ll need it clean and dry, not fuel-soaked or clogged. Purge trapped air by squeezing the trigger with the spark plug disconnected or by using the purge valve if equipped, then readjust the choke and attempt again.
If failure persists, inspect and replace the spark plug, verify spark generation, and check for water contamination in fuel or carburetor passages.
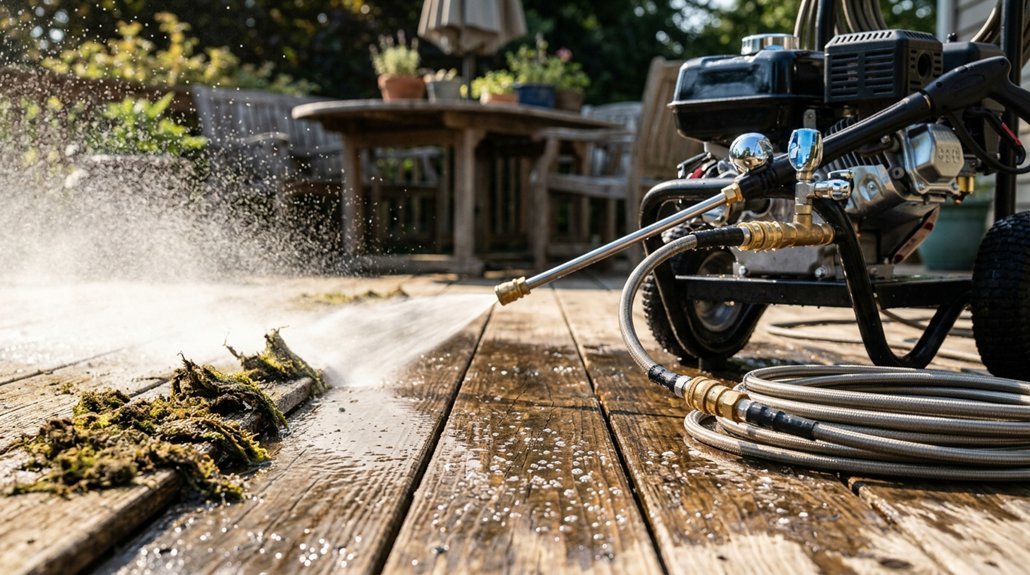
Adjust Pressure and Technique for Your Task
Once you’ve got the engine running reliably, you’ll need to tailor the pressure output and your cleaning approach to the specific surface and soil level you’re tackling. Start with the lowest pressure setting on your wand and increase only as needed, observing both cleaning effectiveness and surface integrity to prevent damage.
Select the appropriate spray pattern: deploy a wide fan for broad surfaces and switch to a narrow, concentrated stream for stubborn grime, adjusting at the gun or wand end as required. Maintain a consistent standoff distance of 6–12 inches for difficult spots, and never dwell in one location to avoid substrate erosion. For delicate materials, install a low-pressure nozzle and employ continuous sweeping motions to eliminate stripping or etching risks.
Shut Down, Depressurize, and Store Safely
Proper shutdown of a gas pressure washer protects both the equipment and the operator from residual hazards. Close the choke, turn the engine switch to OFF, and squeeze the trigger to release built-up pressure before disconnecting any components.
Turn off the water supply, then disconnect the high-pressure hose and garden hose.
Remove the nozzle and return it to its holder.
Depressurize the system by releasing the trigger and holding the gun until all water pressure drops completely.
Store the gun, wand, hoses, and nozzle in their designated holders or compartments to prevent damage and eliminate tripping hazards.
Drain or relieve any remaining water from the pump or hoses if your manual specifies this step.
Place the unit in a dry, upright position for safekeeping.
Conclusion
You’ve completed the full startup sequence: verified fluids, connected all hoses, purged air, set choke and throttle, opened the fuel valve, and engaged the ignition. You’ll pull the starter cord firmly until the engine fires, then adjust your nozzle and pressure for the surface. When finished, you’ll shut off fuel, depressurize the system, and store properly. Follow this systematic process each time—you’ll guarantee safe, reliable operation and extend your equipment’s service life.