You’ll start your pressure washer correctly when you follow a precise sequence of connections, purges, and checks. Skip a single step and you risk damaging the pump or injuring yourself. The next sections break down exactly what to do.
Start Your Pressure Washer: The Complete Overview
Where do you begin with a machine that combines water, pressure, and electricity? You start by understanding that water pressure management and nozzle selection determine your cleaning effectiveness.
First, you’ll connect the water supply. You’ll attach your garden hose to the pressure washer inlet, ensuring you’re fully on and checking for leaks. You’ll let water flow through the system to purge air before you activate the pump.
Next, you’ll connect the pump outlet to your trigger gun. You’ll attach the wand securely, confirming locked connections that’ll withstand operating pressure.
Finally, you’ll execute nozzle selection. You’ll match the color-coded system to your task: you’ll use wide-angle nozzles for large surface areas and narrow patterns for concentrated cleaning. You’ll verify each connection before you pull the trigger, ensuring you’ve built pressure correctly through every step.
Prepare Your Power Source and Water Supply
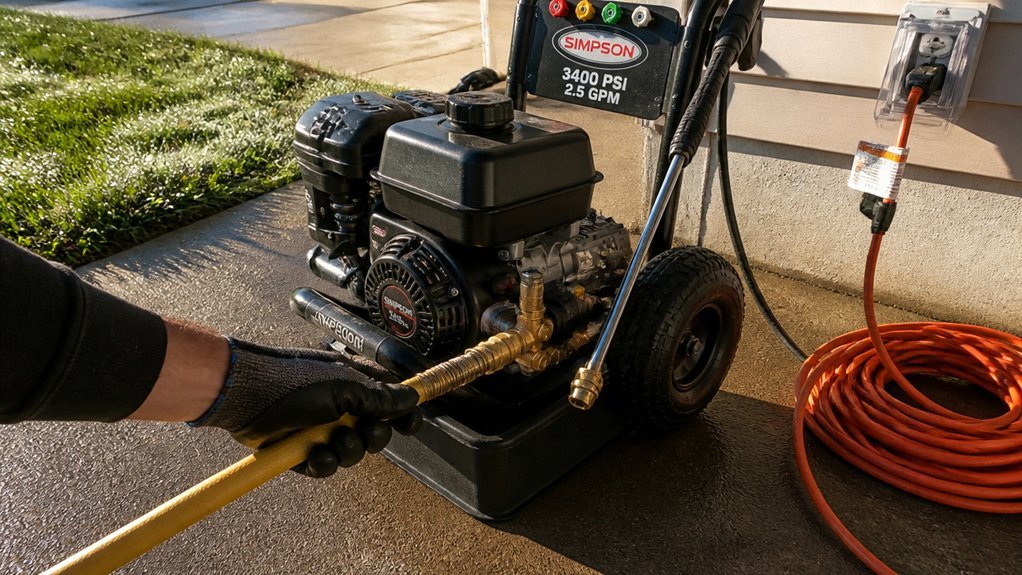
Before you pull the trigger, you’ve got to give your machine something to work with. Plug your pressure washer into a suitable outlet. If the cord won’t reach, use a properly rated extension cord rated for the amperage draw.
Connect your water supply. Turn on the garden hose at the spigot and fully open the valve. You need continuous water flow to the pump—without it, you’ll damage the seals.
Attach the high-pressure hose to the trigger gun and to the washer’s pressure outlet. Tighten both connections.
Assemble the wand. Install any optional accessories. Verify each connection is secure.
Check the entire water line. Remove kinks. Locate leaks. Confirm your power source is stable. Don’t start the motor until you’ve verified uninterrupted water supply and reliable electrical connection.
Connect Hoses, Gun, and Wand

How do you channel water from the pump to the spray? You’ll create the pressurized path by connecting the high-pressure hose to the pump outlet and to the trigger gun.
First, attach your garden hose to the black threaded connection on the washer so the water supply can feed the system. Ensure the hose bib is fully open.
Next, slide the wand onto the trigger gun and secure it using the wand’s twist or locking mechanism. Verify all connections are tight and free of kinks before powering the unit—this prevents leaks and pressure loss.
Finally, confirm the nozzle is attached by pulling back the brass collar and locking it into place before activating the water supply and pressure washer.
Choose and Attach the Right Nozzle
Because different jobs demand different spray patterns, you’ll need to match the nozzle to your cleaning task. Nozzle colors indicate specific spray patterns: black indicates low pressure for chemicals, white provides 40 degrees for delicate surfaces, green delivers 25 degrees for general washing, yellow produces 15 degrees for concentrated cleaning, and red generates 0 degrees for maximum force on stubborn grime. You’ll select wide-angle nozzles for fast, broad coverage and narrow-angle options for deep cleaning.
Start with the middle orange nozzle for general tasks. Test on an inconspicuous spot before proceeding.
To attach, pull back the brass collar, align the nozzle with the wand outlet, and push firmly until it locks. Avoid high-pressure nozzles on delicate surfaces. Switch nozzles as needed based on results.
Turn On Water and Check for Leaks
With the nozzle locked firmly in place, you’re ready to introduce water to the system. Turn on the water supply at the hose bib fully. This ensures steady flow and prevents pump damage. Immediately inspect the garden hose for kinks or leaks. Tighten any loose connections you find.
Next, attach the high-pressure hose to the pump outlet and trigger gun. Secure both ends completely. You’re checking for leaks at every junction. A tight seal prevents pressure loss and hazardous disconnections.
Once connected, squeeze the trigger briefly. This purges air from the lines and verifies clean water flow. Watch for water spraying from fittings—this signals leaks requiring immediate correction. Don’t proceed until you’ve eliminated all leaks and confirmed uninterrupted water delivery through the system.
Power On and Start Cleaning
What’s the final step before you unleash that cleaning power? You’ll complete the nozzle selection process first. Pull the brass collar on the spray wand and attach the appropriate nozzle, locking it firmly into place.
Next, plug your pressure washer into a suitable outlet. If the cord won’t reach, use an extension cord rated for outdoor equipment. Verify your water supply remains fully open and free of kinks.
Now turn on the pressure washer. Listen for the motor engaging. Check that no GFI outlets have tripped. Once you hear the pump activate, you’re ready.
Pull the trigger to initiate the spray. Move methodically across your surface, maintaining consistent distance. You’ve powered on successfully. Clean with steady, overlapping strokes for uniform results.
Test Spray Pattern on a Hidden Spot
How do you know the pressure won’t wreck your surface? You’re going to test spray pattern on a hidden spot first. Locate an inconspicuous area before you tackle the main surface. Lock the middle orange nozzle onto your wand—it’s your default for this procedure. Stand back, grip the trigger, and sweep slowly across that hidden spot. Watch how the spray covers it. Look for bleeding color, chipping, or pitting while you’re testing. You’re checking whether the pressure gouges or cleans safely. If the hidden spot shows no damage and cleans acceptably, you’ve got your settings. Move to wider coverage, keep that safe distance, and maintain the same wand angle and sweep speed throughout the job.
Gear Up: Essential Protection and Mistakes to Skip
The right gear keeps you out of the emergency room and your property out of the repair shop.
Before you start your electric pressure washer, suit up in proper safety gear. You must wear closed-toe shoes and pants—no exceptions. Don’t skip this step, even for quick jobs.
Set up your safety gear fully, then scan your surroundings. Clear the work area completely. Remove obstacles, cover surfaces with tarps, and seal edges with painter’s tape. You’ll prevent costly collateral damage.
Keep the spray wand away from windows, power lines, and overhead hazards. Don’t use a ladder—instability with recoil causes falls. If you spot stubborn stains, pre-treat them with detergent or degreaser now. You’ll cut scrub time and boost results.
Follow this prep and safety routine step by step. You’re ready.
Troubleshoot When Your Pressure Washer Won’t Start
Why won’t your pressure washer fire up? You’ve checked the power source, but the machine stays silent. Re-examine your connections first. Pull the brass collar back and lock the wand, high-pressure hose, and nozzle into place. Loose connections prevent proper pressure buildup.
Next, inspect your water supply. Open the hose bib fully, eliminate kinks, and verify water reaches the pump. A restricted water supply starves the pump and blocks startup.
Confirm you’ve plugged into a GFI-protected outlet with a compatible extension cord. Listen for engagement when you flip the switch.
Still nothing? De-pressurize the system by pulling the wand trigger with the unit off. Re-secure all connections, re-check your water supply, and restart. These steps resolve most startup failures fast.
Shut Down, De-Pressurize, and Store Safely
Once you’ve resolved any startup issues and completed your cleaning tasks, proper shutdown prevents damage and extends equipment life. Turn off the pressure washer, unplug it from the power source, and shut off the water supply to stop residual flow. You’ll de-pressurize the system by squeezing the wand trigger for several seconds until water flow ceases.
Disconnect the garden hose from the machine inlet and remove the high-pressure hose from both the wand and pump. Drain remaining water from all lines to prevent freeze damage or mineral buildup.
You’ll store safely by reattaching hoses in reverse setup order, winding cords neatly, and securing them with Velcro straps or organizers. Position the wand in its holder. Keep the unit in a dry, protected location, ensuring it’s stable for next use.
Conclusion
You’ve now completed the full pressure washer startup sequence. You’ve connected your water supply, attached all hoses and fittings, selected the proper nozzle, verified flow and checked for leaks, tested your spray pattern, donned protective gear, and troubleshot any issues. When finished, you’ll shut down the motor, de-pressurize the system, disconnect hoses, and store the unit in a dry location. Follow these steps precisely each time for safe, effective operation.