You’ll bend grass blades in alternating directions to create that professional light-and-dark contrast. A rear roller on your mower presses each pass downward; the bent blades reflect less light, while upright blades reflect more. Your mowing direction, deck height, and sun position all determine stripe sharpness. The underlying mechanics are straightforward, but one misstep in timing or blade condition will flatten your results entirely.
How Lawn Striping Works: The Light-and-Dark Blade Trick
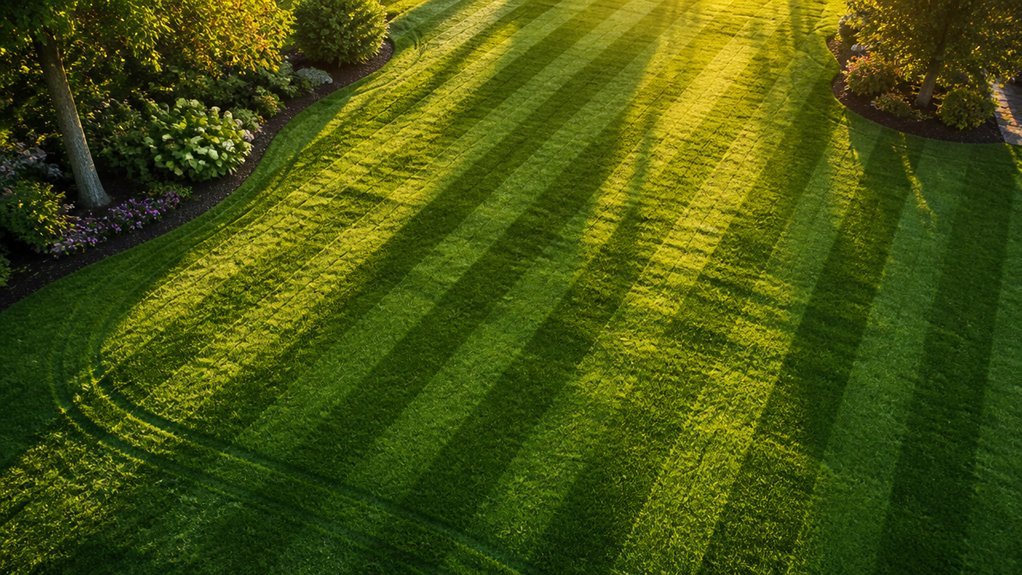
How exactly does a lawn create those crisp, alternating stripes you see on professional fields?
You’ll achieve each stripe through controlled blade bending and light-dark reflection. When you mow with a rear roller, you’ll push grass blades forward. Blades bending away from your viewing angle expose more leaf surface to reflect light, creating lighter stripes. Conversely, blades bending toward you reveal more tip and shadow, producing darker stripes. This stripe phenomenon intensifies with taller cuts and firmer roller pressure, increasing blade displacement. Cool-season grasses—Kentucky bluegrass, perennial ryegrass, turf-type tall fescue—yield optimal results due to their flexible structure. Remember, you’ll perceive reversed colors when viewing from opposite directions or under shifting sun angles; stripe visibility depends entirely on your position and lighting conditions.
Mow in Alternating Directions to Create Your First Stripes

Understanding how light bends off grass blades gives you the foundation; now you’ll put that knowledge into practice. You’ll establish your mowing pattern by traversing the lawn in one direction, then immediately cutting perpendicular paths to maximize contrast between stripe surfaces. Each pass demands straight-line precision with consistent row spacing to maintain uniform lawn stripes.
You’ll achieve the strongest visual effect by completing one directional set before rotating ninety degrees; this orients grass blades in opposing directions, creating distinct light and dark bands. Raise your deck height—longer blades bend more dramatically, amplifying stripe definition. After establishing your grid, you’ll execute a perimeter mow to eliminate edge irregularities and align initial and final stripes cleanly.
Pick Grass and Blade Conditions That Maximize Stripe Definition

Which grass you choose and how you maintain it will determine whether your stripes merely appear or truly command attention. You’ll achieve optimal stripe visibility with Cool-season grasses, including Kentucky bluegrass, perennial ryegrass, and turf-type tall fescue, as their flexible blades bend readily and generate pronounced light-dark contrasts. Bermudagrass, centipede, and zoysia perform adequately; St. Augustine stripes but loses definition faster.
Blade condition directly impacts results. You’ll sharpen your mower blades regularly to ensure clean cuts—torn blades bend unevenly and diminish stripe clarity. You’ll also raise your mowing height, since longer blades provide greater surface area for differential light reflection.
Finally, you’ll maintain dense, vigorous turf through consistent fertilization, targeted weed suppression, and strategic reseeding. Thin or patchy lawns can’t produce uniform light reflection, so you’ll prioritize turf health to maximize stripe definition.
Add a Roller or Striper for Professional-Grade Lawn Striping
Why settle for faint stripes when you can command professional-grade definition? Attach a roller or striper behind your mower to press grass blades downward, amplifying the striping effect through directional light reflection.
You have three options: homemade devices, standard lawn rollers, or purpose-built stripers. Purpose-built models like the Scag Tiger Striper employ spring force to bend grass more aggressively, delivering intense stripe contrast. Before purchasing, verify compatibility with your mower manufacturer—mounting hardware and weight capacity vary across brands and deck sizes.
You’ll achieve bolder results by maintaining higher mowing heights and ensuring longer blade contact with the roller surface. Always assess safety considerations and equipment maneuverability; heavier rollers increase stripe definition but require more operator control during turns and transport.
Mow With the Sun Behind You for Maximum Stripe Visibility
Once you’ve equipped your mower with a roller or striper, your next move is positioning yourself relative to light. You’ll maximize stripe visibility by keeping the sun behind you as you mow. When light strikes bent grass blades from behind, the alternating faces reflect and absorb light differently, creating sharp light-dark contrast. If the sun faces you, stripes wash out.
Track your property’s sun patterns with a sun map to identify when and where backlighting occurs. Then align each mowing pattern so stripes run perpendicular to the primary viewing angle from driveways or approach points, ensuring the sun stays behind you during peak viewing times. For yards with multiple vantage points, adjust your mowing pattern timing or direction to capture optimal backlighting on the grass blades throughout the day.
Advance From Straight Stripes to Checkerboards and Diamonds
How quickly can you move beyond basic striping? You’ll advance to complex lawn stripe patterns by building on your straight-stripe foundation. Start each session with a perimeter mow, then cut your primary stripes in opposing directions. To create a checkerboard, you’ll re-mow perpendicular to that base direction, crossing your original lines at ninety degrees. Finish with a perimeter pass to even out edges. For diamond patterns, you’ll align each row at a forty-five-degree angle to your initial direction, alternating directions on successive passes. You’ll maintain consistent deck width on every pass to prevent overlap or gaps. Final perimeter mowing removes irregularities and sharpens the geometry. Reverse or offset the sequence across adjacent sections so checkerboard and diamond patterns remain visible from any viewing angle.
Conclusion
Now you’ve mastered the mechanics: alternating passes bend blades to refract light, while rollers amplify the effect. You’ll maximize contrast with cool-season turf, sharp blades, and backlighting. Rotate your pattern ninety degrees weekly to prevent grain buildup. Execute perimeter passes last, then advance to checkerboards by intersecting at precise angles. Maintain consistent deck height and dense turf for uniform reflection. Your striped lawn demonstrates controlled agronomic manipulation—replicable, measurable, and visually precise.